In this article, we will set up the Samba service as a domain controller and also file sharing using a remote NFS storage server. If you only want to set up the domain controller, skip the NFS server configuration step.
Overview of the steps to be performed
- NFS Server Configuration
- Installation and configuration of Samba
- Windows computer joining the domain
- Creation of groups and users
- Login script configuration
- Configuration of shares
NFS Server Configuration
Operating System Information Used for the NFS Server
OS: CentOS Linux 7 (Core)
Kernel: Linux 3.10.0-1160.92.1.el7.x86_64
Architecture: x86-64
IP: 192.168.1.13
Install the NFS service.
Centos:
yum install nfs* -y && systemctl enable nfs && systemctl start nfsDebian:
apt install nfs-common nfs-kernel-server -y && systemctl enable nfs-server && systemctl start nfs-serverTo add the shared directories, edit the file /etc/exports
Edit the IP and folders according to your scenario. The file should look like this:
/home/shared 192.168.1.0/24(rw,no_root_squash,no_subtree_check)Save the file and run the command below (NFS server IP):
showmount -e 192.168.1.13If the command displays the following output, the sharing is working correctly:
/home/shared 192.168.1.0/24Samba DC Server Configuration
Operating System Information Used for the Samba Server
OS: Debian GNU/Linux 12 (bookworm)
Kernel: Linux 6.1.0-13-amd64
Architecture: x86-64
IP: 192.168.1.12
If needed, this article contains a step-by-step guide that may assist in installing Debian.
Steps for configuration
Update the repositories
apt update -yIn case the error occurs:
Err:2 cdrom://[Debian GNU/Linux 12.2.0 _Bookworm_ - Official amd64 DVD Binary-1 with firmware 20231007-10:29] bookworm ReleaseEdit the file /etc/apt/sources.list and comment out the line:
deb cdrom:[Debian GNU/Linux 12.2.0 _Bookworm_ - Official amd64 DVD Binary-1 with firmware 20231007-10:29]/ bookworm main non-free-firmwareLet’s install some utility packages:
apt install vim -yInstall the NFS client
apt install nfs-client -yExecute the command (NFS server IP):
showmount -e 192.168.1.13If everything is configured correctly, you should see the shared directory from the NFS server on this machine
/home/grupos 192.168.1.0/24The sharing is already visible, but to access the folders, you need to mount the directories. To do this, edit the file /etc/fstab and add the line according to the example below:
192.168.1.13:/home/shared /tmp/shared nfs defaults 0 0Create the directory /tmp/shared
mkdir -pv /tmp/sharedTo mount the directory, type the command
mount -aCheck the result with the command df
df -hThe /home/shared directory from the NFS server has been mapped to the /tmp/shared folder on the Samba server
Installation of Samba
Install the necessary packages
apt install samba krb5-user krb5-config winbind smbclient -yDuring the installation, some Kerberos information will be requested (Edit according to your domain):
Realm Kerberos: DOMAIN.COM
Kerberos servers for your realm: AD.DOMAIN.COM
Administrative server for your Kerberos realm: AD.DOMAIN.COM
Let’s prepare the Samba domain controller service
Move the file /etc/samba/smb.conf to the folder /tmp (or another directory)
mv /etc/samba/smb.conf /tmp/Run the command:
samba-tool domain provision --use-rfc2307 --interactiveSelect according to your realm information (In this case, the same as we configured for Kerberos). In the empty fields, press Enter to accept the default value and create a strong password for the Samba administrator user
Realm [DOMAIN.COM]: AD.DOMAIN.COM
Domain [AD]:
Server Role (dc, member, standalone) [dc]:
DNS backend (SAMBA_INTERNAL, BIND9_FLATFILE, BIND9_DLZ, NONE) [SAMBA_INTERNAL]:
DNS forwarder IP address (write 'none' to disable forwarding) [192.168.1.1]:
Administrator password:
Retype password:
Move the file /etc/krb5.conf to the folder /tmp
mv /etc/krb5.conf /tmpCopy the file /var/lib/samba/private/krb5.conf to the folder /etc
cp /var/lib/samba/private/krb5.conf /etcStop and disable the services smbd, nmbd, and winbind (The samba-ad-dc service aggregates all necessary services, so these individual services are not needed)
systemctl stop smbd nmbd winbindsystemctl disable smbd nmbd winbindRestart the Samba service
systemctl restart samba-ad-dcJoining a Windows machine to the domain
To perform this test, we will use Windows 7, but the same procedure works for 10 and 11.
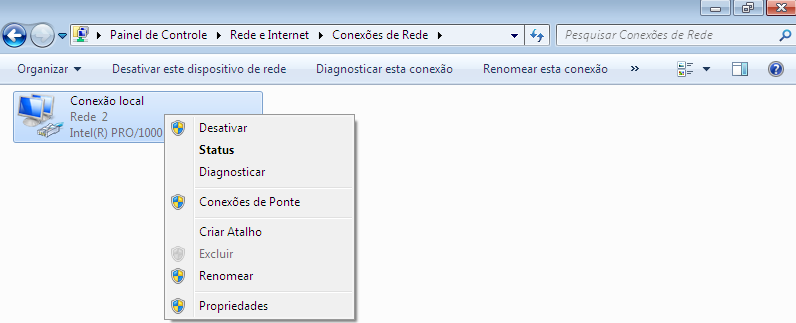
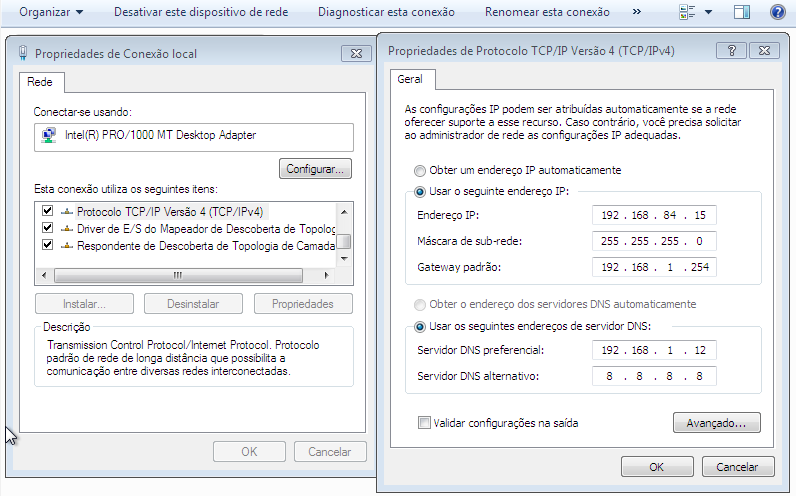
It is important to configure the DNS with the IP of the Samba server to join the machine to the domain.
Go to the computer’s network options and make the changes.

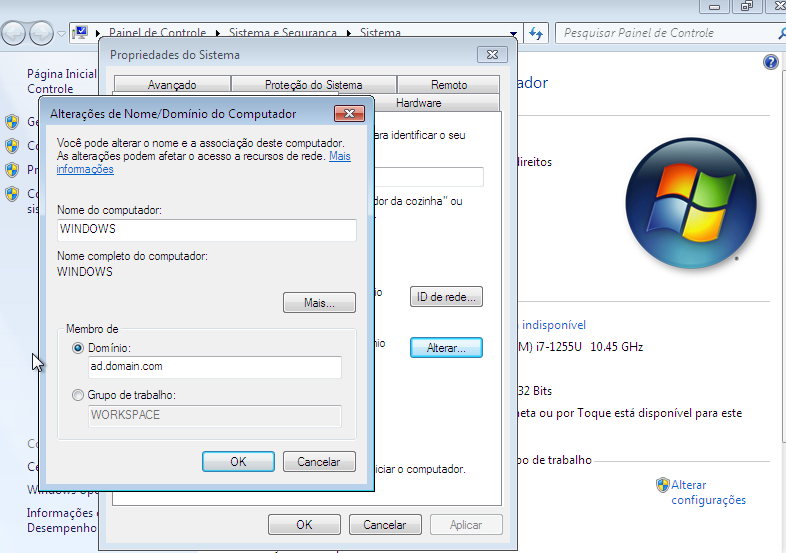
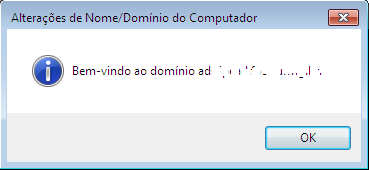
Enter the domain machine.
Creating Samba users
First, create the users on Linux (In this example, we will create three users)
adduser pedroadduser joaoadduser mariaAlso see


Define a password for the users.
passwd pedropasswd joaopasswd mariaCreate the same users in Samba with the same password.
samba-tool user create pedro Password123 --home-drive=H --script-path=logon.vbs --home-directory=\\ads\pedrosamba-tool user create joao Password123 --home-drive=H --script-path=logon.vbs --home-directory=\\ads\joaosamba-tool user create maria Password123 --home-drive=H --script-path=logon.vbs --home-directory=\\ads\mariaNow let’s run a script to synchronize user IDs so that the Linux user and the Samba user are recognized as a single user.
First, install the ldb-tools tool.
apt install ldb-tools
Create the file uid_sync.sh with the following content
#!/bin/bash

# Variavel com listagem de usuarios inseridos no Samba
list="$(samba-tool user list | egrep -v 'Administrator|Guest|krbtgt')"

for LSUSER in $list
    do
        # Variavel com listagem de SIDS de usarios do AD
        sid="$(wbinfo -n $LSUSER | awk -F" " '{print $1}')"

        # Variavel com UID de usuarios da base Unix
        ids="$(getent passwd $LSUSER | awk -F: '{print $3}')"

        # Converte SID para UID nos usuarios do AD
        wbinfo -S $sid >> /dev/null

        # Cria arquivo ldif temporario
        > /tmp/modify.ldif

        # Preenche o arquivo temporario com os novos dados
        echo "dn: CN=$sid" >> /tmp/modify.ldif
        echo "changetype: modify" >> /tmp/modify.ldif
        echo "replace: xidNumber" >> /tmp/modify.ldif
        echo "xidNumber: $ids" >> /tmp/modify.ldif
        echo "" >> /tmp/modify.ldif

        # Modificacao do mapeamento de UIDS via modify.ldif
        ldbmodify -H /var/lib/samba/private/idmap.ldb /tmp/modify.ldif
done
Give execute permission to the file:
chmod a+x uid_sync.shRun the script:
./uid_sync.shThe output should be the same as the image.

Creating Samba Groups
Let’s use two groups as examples: “collaborators” and “managers”.
Create the groups in Linux:
addgroup colaboradoresaddgroup gerentesCreate the same groups in Samba:
samba-tool group add colaboradoressamba-tool group add gerentesCreate the gid_sync.sh file with the following content:
#!/bin/bash

# Array com grupos do Samba
smb_groups=('gerentes' 'colaboradores')

for grupos in ${smb_groups[@]}
    do
        # Variavel com listagem de SIDS de usarios do AD
        xid=`wbinfo --group-info=$grupos | cut -d: -f3`

        # Converte XID para GID nos usuarios do AD
        sid=`wbinfo -G $xid`

        # Variavel com UID de usuarios da base Unix
        gid=`getent group $grupos | cut -d: -f3`

        # Cria arquivo ldif temporario
        > /tmp/modify.ldif

        # Preenche o arquivo temporario com os novos dados
        echo "dn: CN=$sid" >> /tmp/modify.ldif
        echo "changetype: modify" >> /tmp/modify.ldif
        echo "replace: xidNumber" >> /tmp/modify.ldif
        echo "xidNumber: $gid" >> /tmp/modify.ldif
        echo "" >> /tmp/modify.ldif

        # Modificacao do mapeamento de UIDS via modify.ldif
        ldbmodify -H /var/lib/samba/private/idmap.ldb /tmp/modify.ldif
done
Give permission to the file:
chmod a+x gid_sync.shExecute the script:
./gid_sync.shThe output should be similar to the image.

Configuration of the logon script
Let’s create the logon script so that the mapping of shared folders is performed when the user logs in.
In the folder /var/lib/samba/sysvol/ad.domain.com/scripts, create the file logon.vbs with the following content (replace ad.domain.com with your domain):
On Error Resume Next
set objNetwork= CreateObject("WScript.Network")

strDom = objNetwork.UserDomain
strUser = objNetwork.UserName
Set objUser = GetObject("WinNT://" & strDom & "/" & strUser & ",user")

For Each objGroup In objUser.Groups
  Select Case ucase(objGroup.Name)
    Case "GERENTES"
      objNetwork.RemoveNetworkDrive "G","true"
      objNetwork.MapNetworkDrive "G:","\\ads\gerentes","true"
        Case "COLABORADORES"
      objNetwork.RemoveNetworkDrive "I","true"
      objNetwork.MapNetworkDrive "I:","\\ads\colaboradores","true"
  End Select
Next
Configuration of shares
Now create the directories “collaborators” and “managers.” In this example, we’ll create them inside the directory /tmp/groups.
mkdir -pv /tmp/groups/{colaboradores,gerentes}Change the group ownership of the directories.
chown -R :colaboradores /tmp/groups/colaboradoreschown -R :gerentes /tmp/groups/gerentesGive permission to the groups on the directories.
chmod g+rwx /tmp/groups/colaboradoreschmod g+rwx /tmp/groups/gerentesLet’s add the users to the groups. The users “pedro” and “joao” will be part of the “collaborators” group, and the user “maria” will be part of the “managers” group.
adduser pedro colaboradoresadduser joao colaboradoresadduser maria gerentessamba-tool group addmembers gerentes mariasamba-tool group addmembers colaboradores pedrosamba-tool group addmembers colaboradores joaoLet’s create the shares in Samba. Edit the file /etc/samba/smb.conf and add the blocks:
[colaboradores]
        path = /tmp/groups/colaboradores
        read only = No
        guest ok = No
        force create mode = 664
        force directory mode = 775
        valid users = @colaboradores
        write list = @colaboradores

[gerentes]
        path = /tmp/groups/gerentes
        read only = No
        guest ok = No
        force create mode = 664
        force directory mode = 775
        valid users = @gerentes
        write list = @gerentes
Save the file and restart the Samba service:
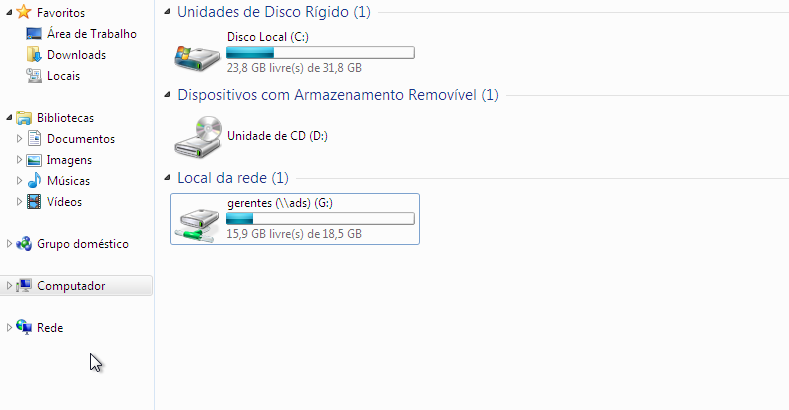
systemctl restart samba-ad-dcWhen logging in with the user “maria” on a computer, it is possible to see the shared folder “managers” that was automatically mapped.
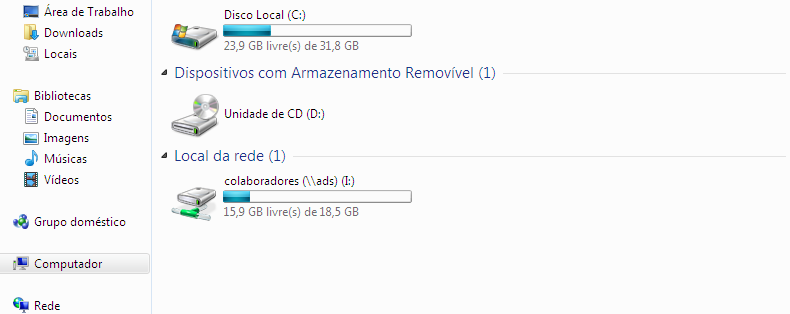
When logging in with the user “pedro,” we can see the “collaborators” folder.
To map the “shared” directory configured on the NFS server, simply create a new share in Samba. Edit the smb.conf file and add:
[shared]
        path = /tmp/shared
        read only = No
        guest ok = No
        force create mode = 664
        force directory mode = 775
        valid users = @gerentes @colaboradores
        write list = @gerentes @colaboradores
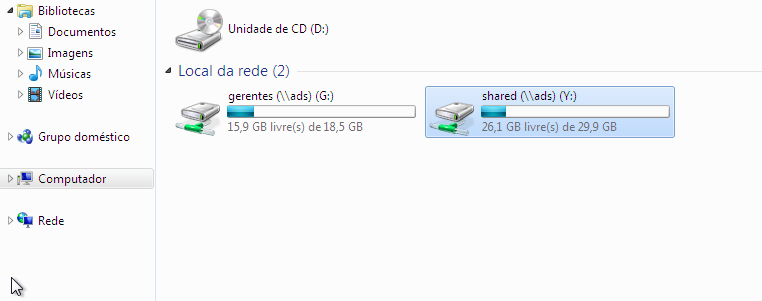
When mapping the directory:
You have completed the Samba Domain Controller setup! Hope this tutorial was useful to you.
Leave a Reply